Connecting a New Toilet to a Sewer Line: A Clear, Step-by-Step Guide
Connecting a new toilet to a sewer line may seem straightforward, but it’s one of the most important connections in your entire plumbing system. Every flush relies on this setup working exactly as it should—quietly, cleanly, and without leaks or odors. When installed correctly, you never think about it. When installed poorly, the problems are immediate and disruptive.
This connection is about more than placing a toilet over a hole in the floor. It involves precise alignment, proper pipe sizing, correct slope, secure sealing, and compliant venting. Each element plays a role in how waste moves through your home and into the sewer system safely. Even small mistakes can lead to slow drains, recurring clogs, water damage, or sewer gas entering the living space.
Homeowners often face this project during bathroom renovations, basement additions, or toilet replacements after flooring changes. In older Long Island homes, outdated drain lines or shifting foundations can add another layer of complexity. Understanding how a toilet connects to the sewer line helps you ask the right questions, recognize red flags, and know when professional installation is the safest option.
A properly connected toilet protects your home, your indoor air quality, and your plumbing investment for years to come.
What It Means to Connect a Toilet to a Sewer Line
A toilet doesn’t connect directly to the municipal sewer main. Instead, it ties into a home’s drain-waste-vent (DWV) system, which carries wastewater safely away while allowing proper airflow.
The basic connection includes:
- The toilet flange mounted to the floor and drainpipe
- A wax ring or rubber seal creating a watertight seal
- A waste pipe (typically 3″ or 4″) that connects to the sewer lateral
- A vent pipe that balances air pressure and prevents siphoning
Each component must align precisely to meet plumbing code and ensure long-term performance.
Common Reasons Homeowners Need a New Toilet Sewer Connection
Connecting a new toilet to a sewer line often comes up during:
- Bathroom renovations or relocations
- Basement bathroom additions
- Home additions or garage conversions
- Replacing a toilet after floor height changes
- Sewer line repairs or replacements
In coastal and older Long Island homes, aging drain lines or outdated plumbing layouts frequently require professional updates.
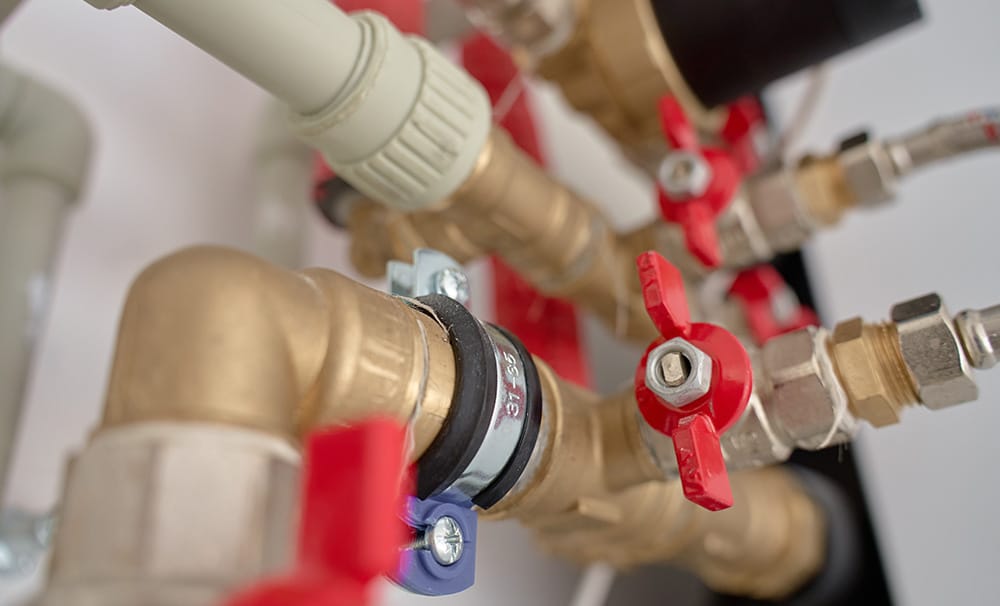
Key Components in a Toilet-to-Sewer Connection
Toilet Flange
The flange anchors the toilet to the floor and connects it to the drainpipe. It must:
- Sit flush with the finished floor
- Be securely fastened to the subfloor
- Match the pipe size and material
Improper flange height is one of the most common causes of leaks.
Wax Ring or Rubber Seal
This seal prevents water and sewer gas from escaping. Wax rings are traditional, while rubber seals are reusable and better for minor height variations.
Drain Pipe (Soil Pipe)
Most toilets use a 3-inch or 4-inch drain line. The pipe must maintain proper slope—typically ¼ inch per foot—to allow gravity drainage.
Venting System
Plumbing vents allow air into the system so waste flows smoothly. Poor venting can cause slow flushing, gurgling sounds, or sewer gas smells.
Step-by-Step Overview: How a Toilet Connects to the Sewer Line
This is a high-level overview. Exact steps vary by layout and local code.
1. Verify Sewer Line Access
The existing drain line is inspected for size, condition, and slope. In remodels, this may involve opening the floor.
2. Install or Adjust the Drain Pipe
The toilet drain is tied into the main branch line using approved fittings. All joints must be sealed and supported.
3. Set the Toilet Flange
The flange is installed at the correct height and secured tightly. Code requires it to sit on top of the finished floor—not below it.
4. Check Venting Compliance
If no vent exists nearby, a new vent line or approved alternative may be required.
5. Set the Toilet and Seal
A wax ring or rubber gasket is placed, and the toilet is set evenly over the flange.
6. Test for Leaks and Proper Flow
Multiple flushes confirm correct drainage and seal integrity.
Drain Pipe Size and Code Requirements
Using the wrong pipe size can cause chronic clogging.
| Fixture | Minimum Drain Size | Typical Use |
| Toilet | 3 inches | Standard residential |
| Toilet (long runs) | 4 inches | Older homes or high-use |
| Sink | 1½–2 inches | Vanity or kitchen |
Local codes often follow standards from organizations like the International Plumbing Code (IPC) or Uniform Plumbing Code (UPC). Municipalities may add stricter rules.
Venting Rules That Matter
Improper venting is a hidden but serious issue.
A correctly vented toilet:
- Flushes quickly
- Refills quietly
- Does not bubble or gurgle
Common venting options include:
- Traditional roof vent connections
- Wet venting with nearby fixtures
- Code-approved air admittance valves (where permitted)
Vent placement, distance, and sizing must meet local plumbing code.
Connecting a Toilet in a Basement or Slab
Basement installations are more complex.
Common Challenges
- Sewer line below fixture level
- Concrete cutting and trenching
- Backwater valve requirements
Possible Solutions
- Ejector pump systems
- Raised platforms
- Gravity-fed connections (when elevation allows)
These projects almost always require professional design and permitting.
DIY vs. Professional Installation
When DIY May Work
- Straight replacement in the same location
- Existing flange and drain in good condition
- No changes to venting or drain layout
When to Call a Pro
- New bathroom installations
- Toilet relocation
- Basement plumbing
- Older or damaged sewer lines
- Persistent leaks or sewer odors
A licensed plumber ensures compliance, safety, and long-term reliability.
Common Mistakes to Avoid
- Installing the flange too low
- Using the wrong wax ring thickness
- Skipping vent verification
- Improper drain slope
- Overtightening toilet bolts
- Ignoring signs of sewer line damage
Even small errors can lead to expensive repairs later.
Timeframe and Cost Expectations
Actual timelines vary by scope.
Typical Timeframes
- Simple replacement: 1–2 hours
- New toilet connection: 4–8 hours
- Basement installation: 1–3 days
Cost Factors
- Pipe material and length
- Floor or slab work
- Venting modifications
- Permits and inspections
For accurate pricing, a site inspection is essential.
Why Professional Installation Matters
Professional plumbers bring experience, code knowledge, and proper tools. They also identify hidden issues like:
- Cracked sewer laterals
- Improper slope
- Aging cast iron or clay pipes
- Root intrusion
For Long Island homeowners, working with a local expert familiar with regional building codes and soil conditions reduces risk.
Related Plumbing Services from Ocean Air Plumbing
Ocean Air Plumbing provides comprehensive solutions beyond toilet installations, including:
- Sewer line repair and replacement
- Drain cleaning and inspections
- Bathroom remodeling plumbing
- Emergency plumbing services
Explore available services at https://oceanaircool.com to see how a licensed team can help protect your home’s plumbing system.
Main Takeaways
Connecting a new toilet to a sewer line is a foundational plumbing task that affects daily comfort and long-term system performance. When the connection is done correctly, the toilet flushes cleanly, drains efficiently, and stays odor-free. When it isn’t, the issues can escalate quickly and become costly.
The toilet flange must sit at the correct height and be securely anchored to the finished floor. The drain pipe must be properly sized, correctly sloped, and tied into the home’s sewer system using approved fittings. Venting is not optional—it ensures smooth drainage and prevents sewer gases from entering the home. Each of these components works together, and skipping or rushing any step compromises the entire system.
Projects become more complex when toilets are relocated, installed in basements, or connected to older sewer lines. These situations often require pipe modifications, vent adjustments, or additional safeguards like backwater valves. This is where professional experience matters most.
Working with a licensed plumber ensures the installation meets local plumbing codes, accounts for hidden issues, and performs reliably over time. For homeowners, that means fewer repairs, better performance, and confidence that the job was done right the first time.
Frequently Asked Questions
How is a toilet connected to the sewer line?
A toilet connects through a floor-mounted flange that seals to a drain pipe leading into the home’s sewer line. Waste flows by gravity through the drain pipe, while a vent system balances air pressure. Proper alignment, sealing, and venting ensure smooth flushing and prevent leaks or sewer gas odors. This connection must meet plumbing code for pipe size, slope, and vent distance to function correctly.
Can a toilet connect to a sewer line without a vent?
No. All toilets require venting. A vent allows air into the plumbing system so waste drains properly. Without it, flushing can cause slow drainage, gurgling sounds, or siphoned traps that allow sewer gas into the home. In some cases, approved air admittance valves may be used where traditional venting isn’t feasible, depending on local code.
What size pipe is required for a toilet drain?
Most residential toilets require a minimum 3-inch drain pipe. Some homes use 4-inch pipes, especially for longer runs or older plumbing systems. Using the correct size is critical to prevent clogs and ensure efficient waste removal. Local plumbing codes dictate exact requirements.
Is it hard to connect a toilet to a sewer line?
Replacing a toilet in the same location is usually straightforward. Connecting a new toilet to a sewer line—especially in a new location or basement—is more complex. It may involve cutting floors, adjusting drain slopes, adding vents, and obtaining permits. These projects are best handled by licensed professionals.
How long does it take to connect a new toilet?
A basic toilet replacement can take one to two hours. A new toilet connection typically takes several hours. Basement installations or sewer modifications may take one to three days, depending on complexity. Actual timelines vary by home layout and inspection requirements.
Get Professional Help Connecting Your Toilet to the Sewer Line
For expert help connecting a new toilet to your sewer line, trust a licensed local team. Ocean Air Plumbing provides professional installations, sewer solutions, and reliable service across Long Island.
Schedule a consultation today:
https://oceanaircool.com/contact-us/